
Eggplant chutney is a spicy and tangy chutney, eggplant/ brinjal blended with ginger, gar...
Chicken roulade with bacon and potato and tomato salad. Chicken roulade stuffed with quin...
Hotness of the sambal served with plain Kiribath a traditional srilankan coconut milk ric...
Yam kabab is a vegetarian snack made with boiled yam and spices. Yummy, Nutritious and a...

Lauki Musallam is a stuffed curry which is a healthy to have on any special occasion to ...

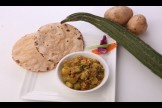
Hello all.... birakaya kura or ridge gourd curry this is the most simple but Delicious c...
This is a crispy tasty Indian dish made with okra and is easy to prepare.
|
About Recipe
|
|||||||||||||||||||||||||||||||||||
|
|||||||||||||||||||||||||||||||||||
 Easy recipes
 Healthy Recipes
 Dessert Recipes
 Mutton and Lamb
  Indian Bread Recipes
 Dal Recipes
 Chutney and Pickles
  Indo-Chinese Recipes
 Snacks and Appetizers
 Low Fat Recipes
 Chaat Recipes
 Biryani and Rice
  Curry Recipes
 Indian Sweet Recipes
 Egg Recipes
 Paneer Recipes
 Chicken Recipes
 Indian tiffins
 Egg less Recipes
 Soups and Salads
 Indian Sea Food
 Manchurian Recipes
 Indian Drinks Recipes
 Dinner Recipes